

An In-Depth Breakdown On How To Run The Gun Bunch Open Offset Offense
Hey guys it’s Ian and in this post, I’m going to walk you through how to run one of the easiest and most effective offenses we have ever broken down on Madden School. It’s extremely in-depth but I promise the reward is worth the effort so bear with me.
The 3 plays are:
- RPO Read Bubble
- Inside Zone
- Flood
The key to making this offense work is that it is just a basic numbers game. 75% of the reads you will make will be done pre-snap and if you have to make a post snap read, they are really easy.
By the end of the video, you should have a firm grasp on the offense. At that point with a little practice you should be ready to take it into a game and try it out for yourself.
Like I mentioned earlier, the key to this offense working is making the pre-snap reads so we are going to go over some screenshots of defenses below to help drive the point home.
If you have questions on how anything works in the video or the screenshots, please leave a comment.
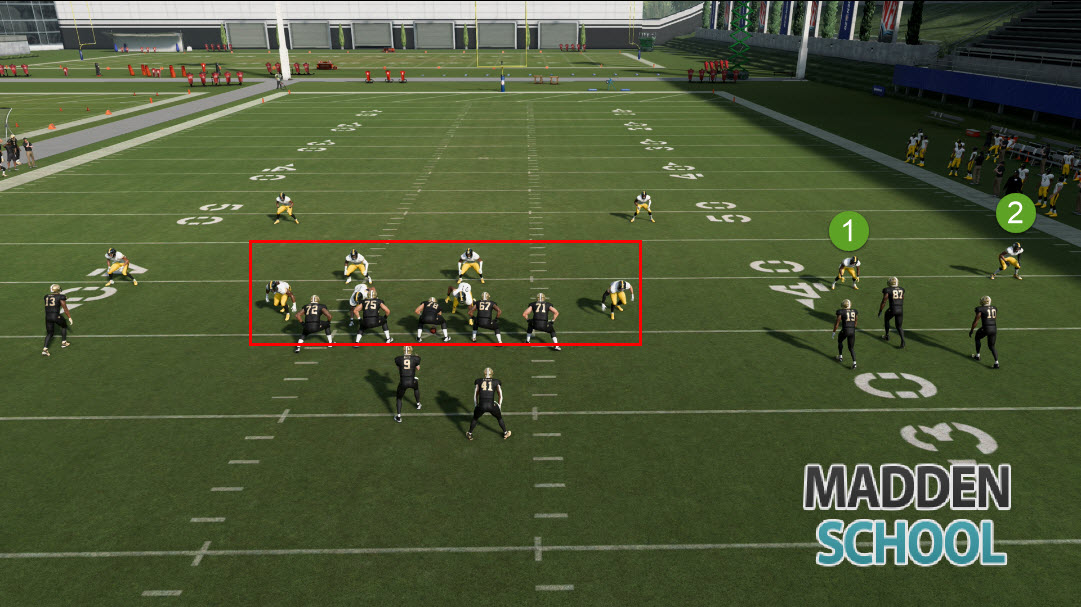
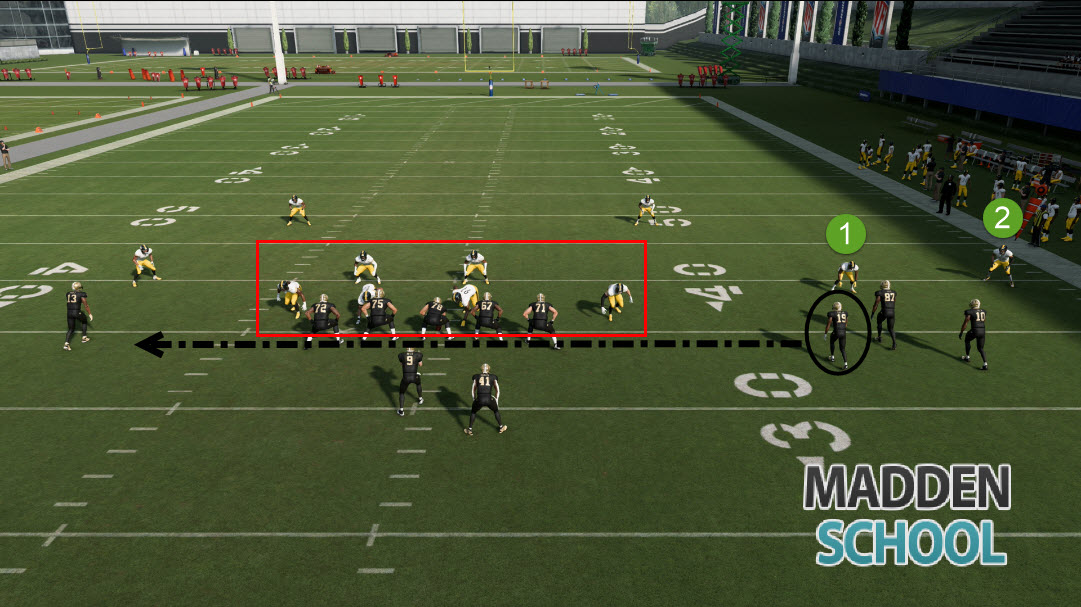
The first thing you want to look at when you come up to the line of scrimmage is how many defenders are over your 3 receivers on the right. In this particular defense, we only count 2 defenders which means that we can throw the Bubble Screen.
The only possible thing at this point that could go wrong is if your opponent is user controlling the OLB on the right and immediately darts to the sideline right when you snap the ball.
We also count that there are 6 defenders lined up in the box. We only have 5 blockers so if we run the ball, we will likely get stopped for a very short gain.
Conclusion: Immediately throw the Bubble Screen

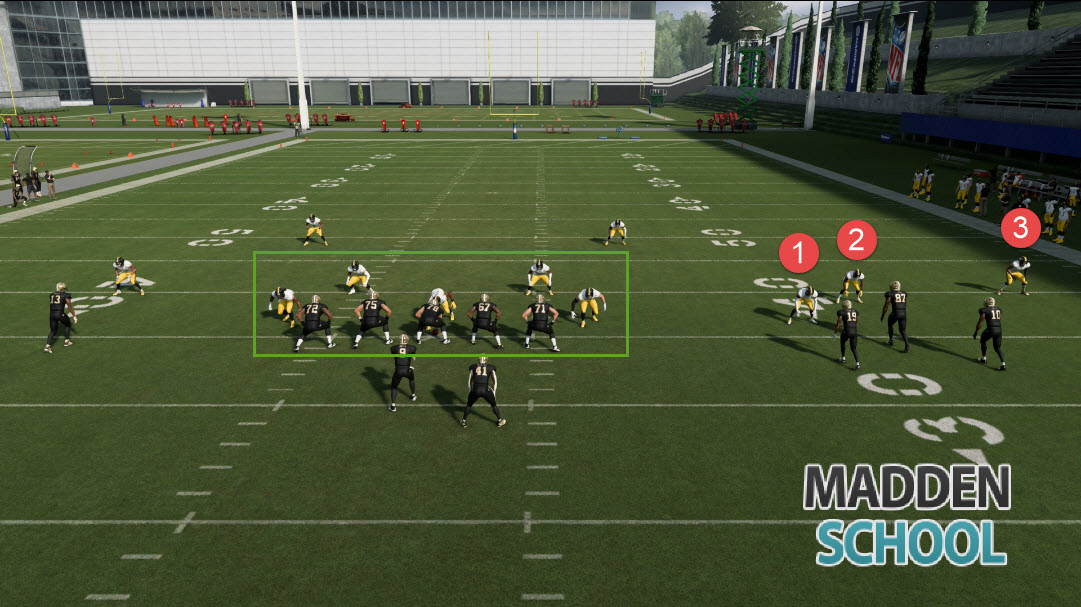
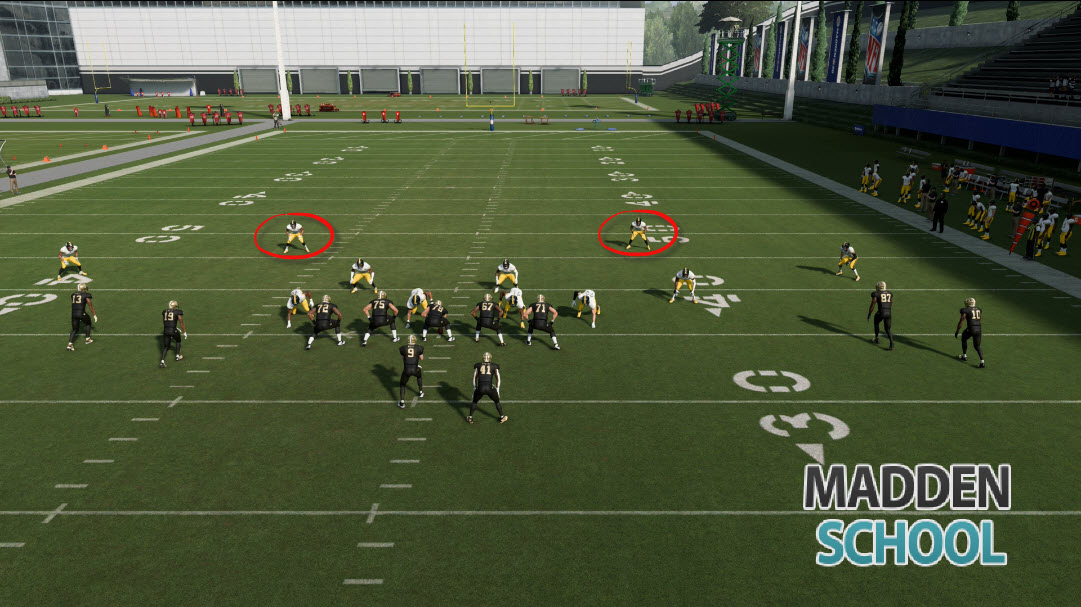
Here is another screenshot of a common defense. This time our opponent is in a 3-4 and is base aligned. Right when we come out of the huddle we see that he has just the 1 defender over our 3 receivers on the right
We also count 7 defenders in the box against our 5 offensive lineman blocking.
Conclusion: Immediately throw the Bubble Screen
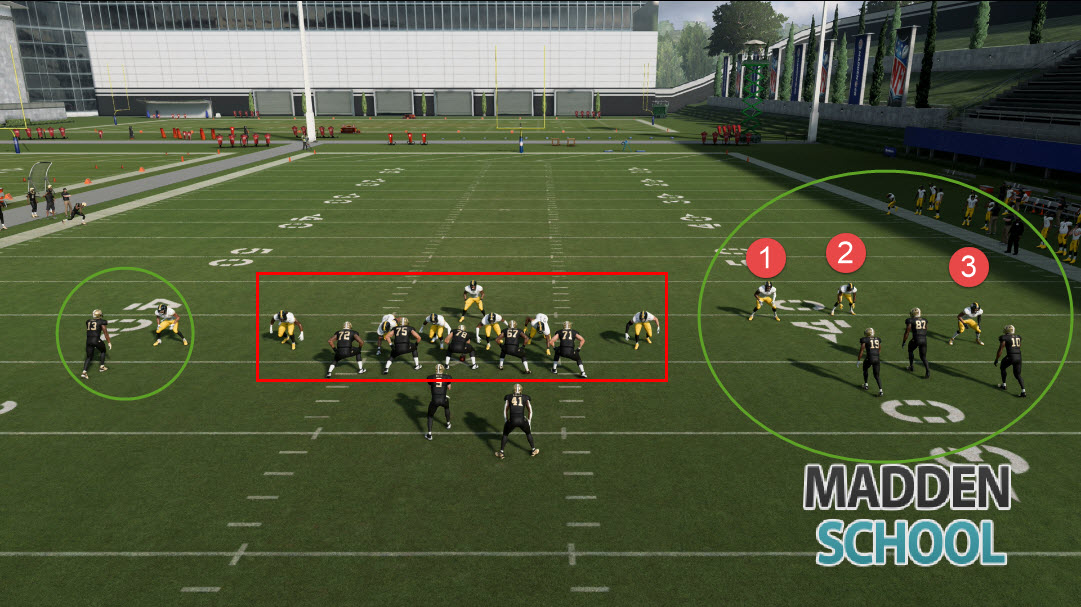
The next screenshot shows a defense that your opponent might call once he is really worried about stopping the screen pass. Notice that there are 3 defenders lined up over our 3 receivers.
However, that means that there are only 5 defenders in the box against our 5 offensive lineman.
Conclusion: Audible to Inside Zone and run it right up the middle

The next screenshot is of the defense in a Dime formation but they are base aligned. Notice that there are only 2 defenders lined up against our 3 receivers on the right.
We also notice that there are only 5 defenders in the box.
Conclusion: Throw the Bubble Screen or audible to Inside Zone and run it up the middle (either one will work).
Eventually your opponent will call something like this. An all out man to man blitz. Notice the 3 defenders lined up over our 3 receivers on the right.
We also count 7 defenders in the box against our 5 offensive lineman blocking.
However notice that all of our wide receivers are in 1 on 1 coverage.
Conclusion: Audible to Flood and use the man to man defense beating version of the play
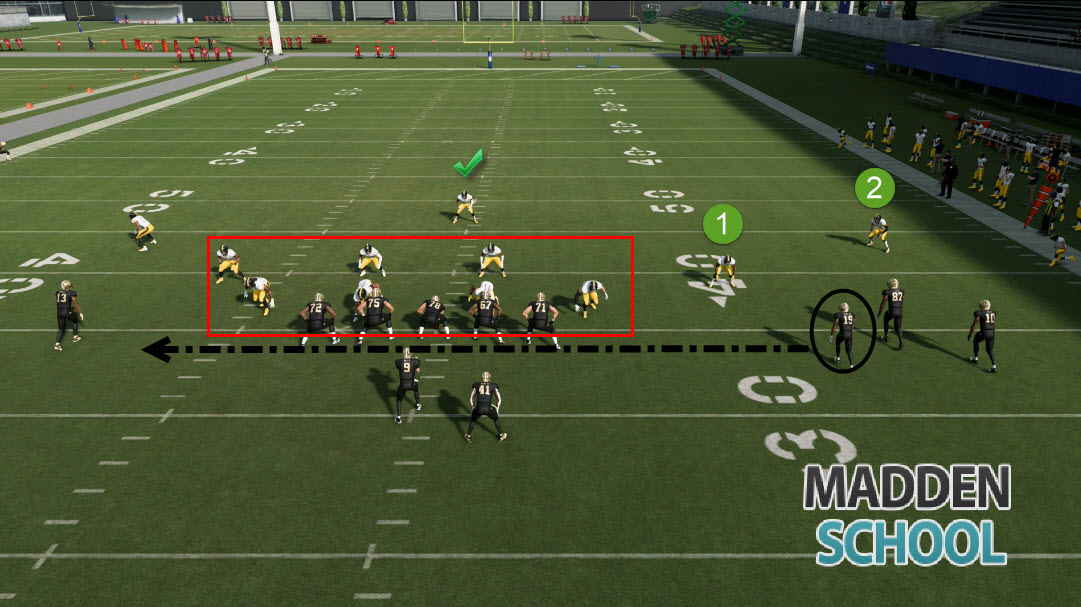
We are now on the right hash mark. We notice that our opponent has 1 high safety which usually means cover 3 defense.
We could throw the Bubble Screen if we wanted to but eventually your opponent will try to take it away himself. Also notice that our opponent has 6 defenders in the box against our 5 offensive lineman so running the ball isn’t a good option.
So we audible to Flood and call the cover 3 beater variation of this play. Motion the A/X receiver over, put him on an out route and put the X/square receiver on a streak route.
Throw to the X/square receiver, lead pass to the sideline.
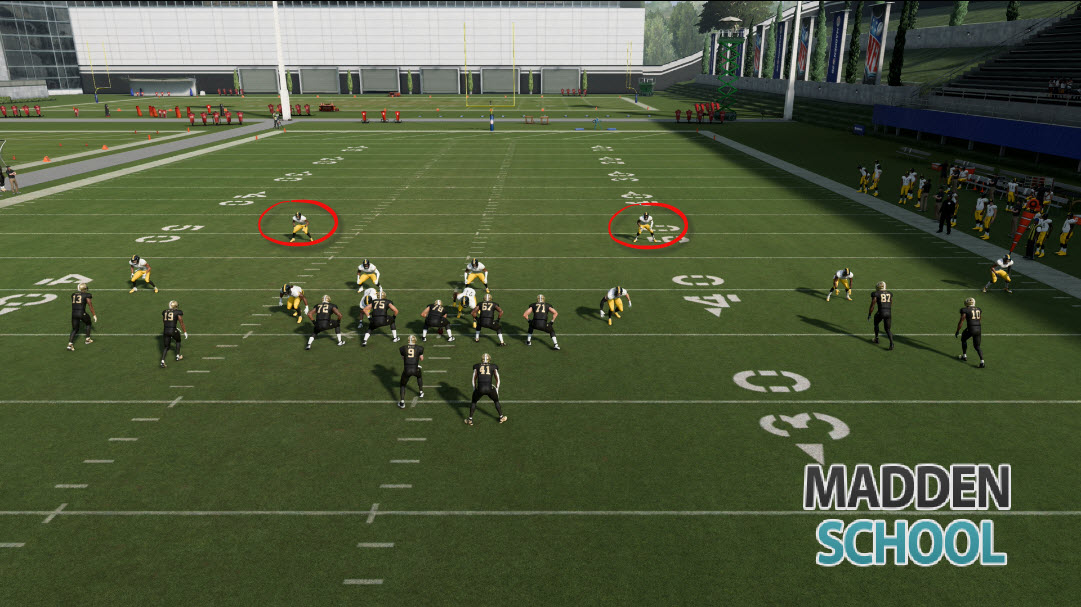
In this next screenshot, we have a similar look from the defense but this time they are base aligned so we can’t tell it is whether it is a cover 3 or a cover 2 defense.
Again, we could throw the Bubble Screen because there are only 2 defenders out there over our 3 receivers. We know our opponent is going to be very aware of the Bubble Screen at this point so we are going to audible to Flood.
Motion the A/X receiver over to the left and put him on an out route. Put the X/square receiver on a streak route.
Once we motion him over, right before we snap the ball we focus in on the 2 deep safeties. They are the very first thing we look at when we get the snap.
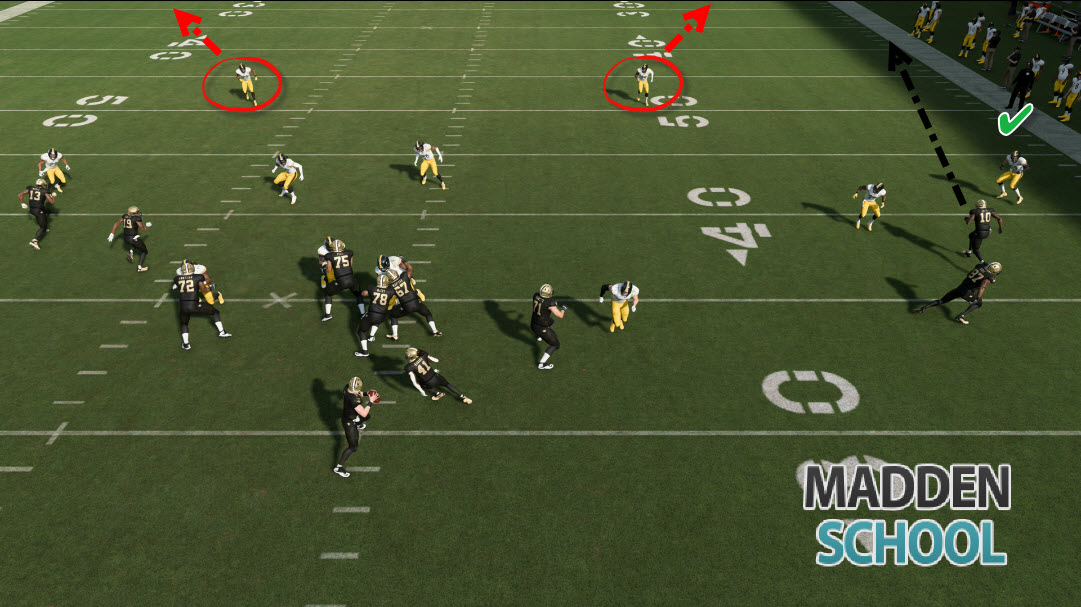
Right when we catch the snap, we notice that both safeties are dropping back and towards the sidelines. That signals it is some sort of Cover 2 defense.
At that point, we just have to check the cornerback on the right to see if he is in man to man coverage or if he is in a zone.
We look at him and he is clearly in a zone defense based on the way he is look right at the quarterback and his positioning on the field.
When we put that information together, that means our B/circle receiver will be open. Once he gets past the cornerback, bullet pass it to him (lead pass to the sideline). This play takes a bit of timing so make sure to practice it a few times before using it in a game.
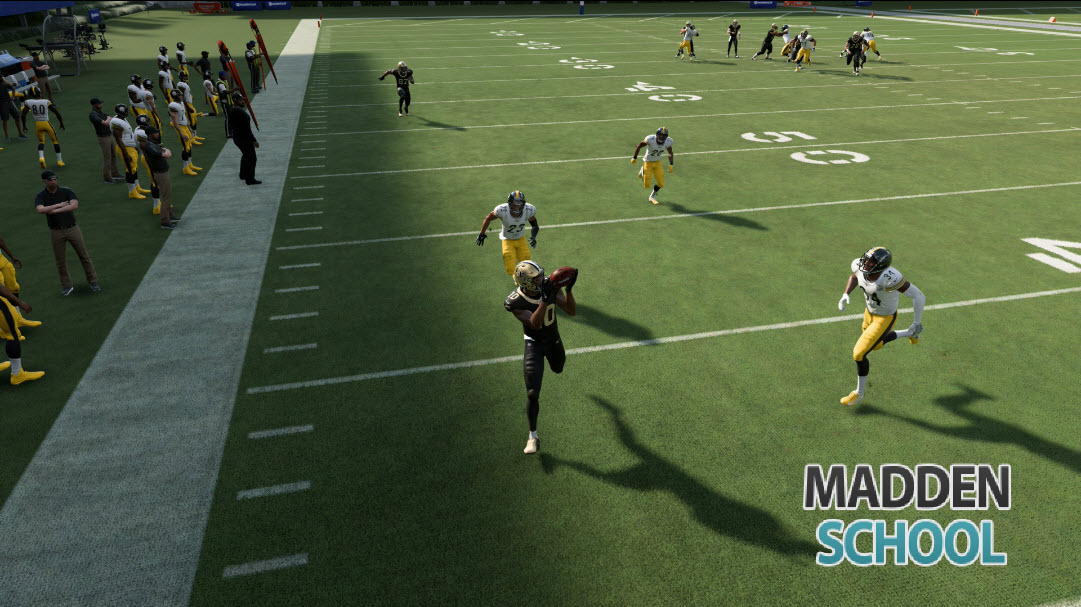
We can see that if we have the timing down right, we’ll make the catch before the safety can get over to the sideline to make a play on the ball.
Again we have the same look because our opponent is base aligned. We aren’t sure what defense our opponent is in pre-snap so we will have to make the read post snap.

Right when we catch the snap, we notice one safety drops down underneath and one safety rotates to the middle of the field.
That means our opponent is in a cover 3 zone defense. We know that our read on this play that beats cover 3 defense it to throw to the X/square receiver on the streak route (bullet pass and lead pass to the sideline).

We make the catch before the safety in the middle of the field can get over to make the play.
If you have any comments or questions, please let me know below. If there are any scenarios I missed or any defenses that you don’t know what to do against, leave a comment!
Yo this 3 play scheme is fire. Do you have anymore like this?
We are always trying to find more
I’m finding my lineman get penalties for being downfield often.
If you are throwing the screen pass, you have to throw it immediately instead of waiting to go through the fake hand off motion.
You really should build on this scheme. Now that Lamar Jackson is out you can go nuts out of this playbook.
Been Mixing this with the rest of the flood scheme, so many options. Absolute Fire.
Would be nice to show some goal line/ red zone options with this, if you don’t hit the money shots earlier and you dink and dunk to the 5 yard line or so it gets difficult.
This scheme is perfect, and this in depth breakdown makes it easier to learn it. can you guys do it for some other formations with various plays ?
Great work!
Ian, this scheme is phenomenal!!
I’ve used formations in the past as a scheme for entire drives in a game, but I have never seen anything like this where you can literally use this scheme for the entire game – literally 100% of the time!!
I could literally imagine my opponent’s head spinning and pulling his hair out trying to figure if I was going to do the screen, the run or some other pass play.
Simply awesome!
Sam C.
Awesome, I’m glad you like it!
Man I love yall ??
That flood play poops on cover 2 bad
Great information! I’m 2-0 so far running this scheme WITH my Baltimore Ravens! Thanks!
Awesome! Glad you like it Militant X 1 and thanks for joining us again this year!
It is extremely helpful to have the explanation, and screen shots to look along with the video! I’m an unlimited member, and I enjoy learning to read defenses. The way this offensive set was presented is excellent!
Dude I’m a newbie in here and I’ve been on other sites but this is the best I’ve seen as far as how much detail you put into your videos and setups. It’s safe to say I’m a lifer now lol.
That’s awesome man, so glad to have you!